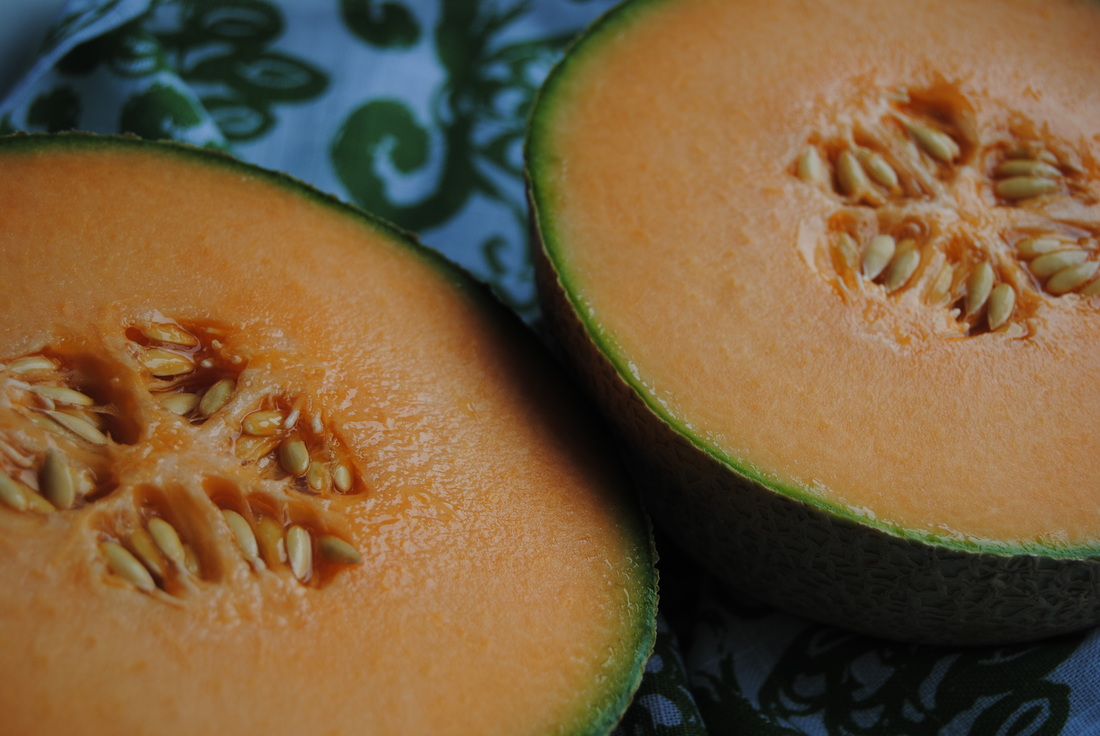
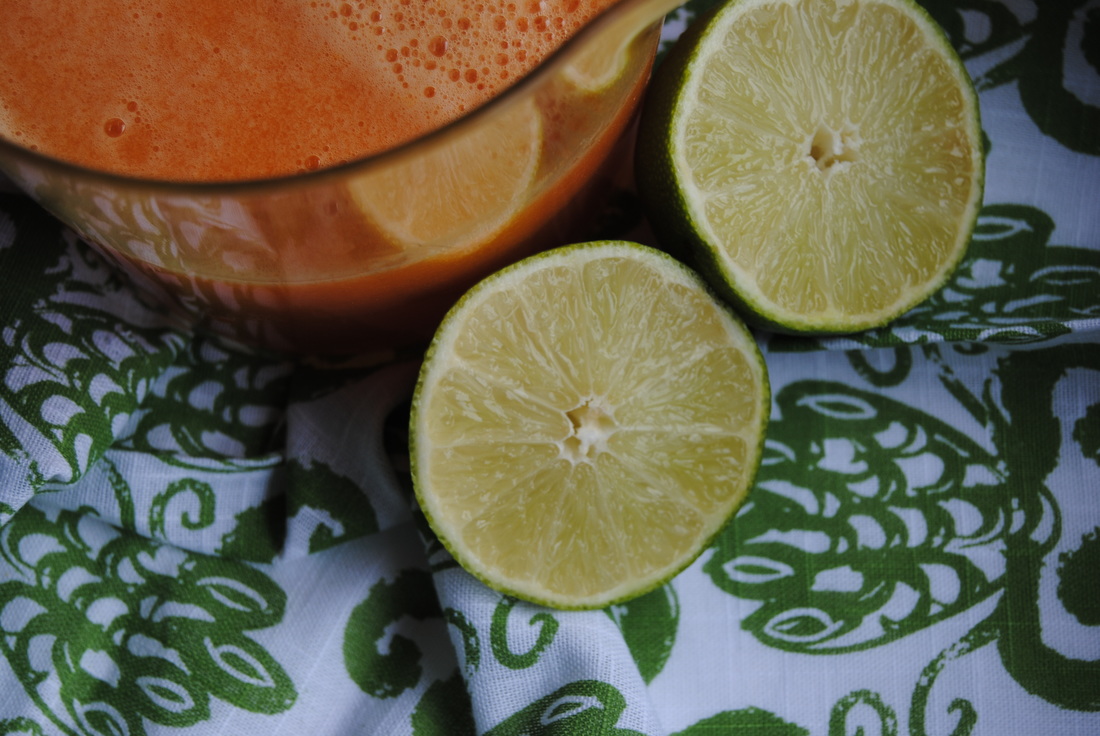
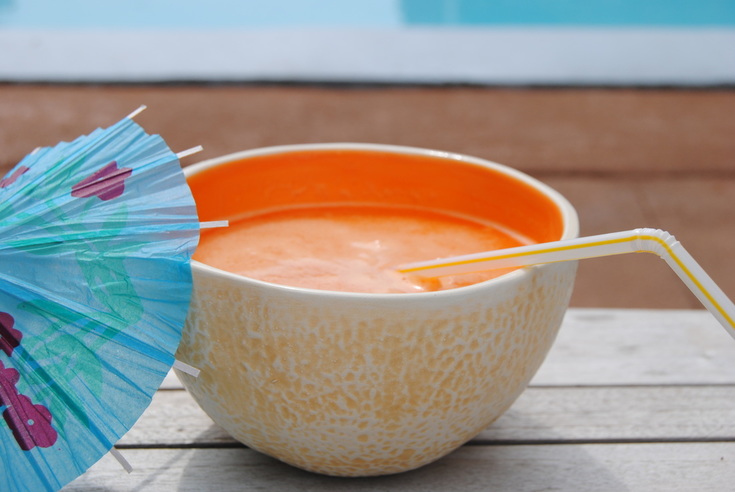
 Ahhhhh, summer - what we've been dreaming about all year. Now that it's finally here we sure hope you are enjoying it in your favorite ways. One of our favorite ways to enjoy summer is poolside with a homemade fresh juice. And how perfect because fresh juice is all the craze these days. But besides the taste, what is this craze all about? Let's find out... 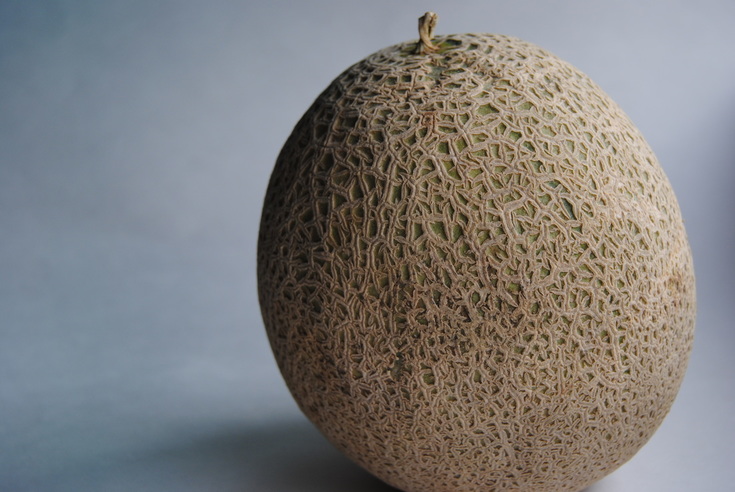 Juices can be found in many different forms. The most common being your standard store bought bulk bottled juices. The quality varies but don't be mislead, even 100% juices aren't quality nutrition because during the processing and pasteurization process many of the beneficial nutrients (vitamins, enzymes and antioxidants) found in fresh fruit are lost. Large name companies often add vitamins back to the juice but they are in synthetic form which (obviously!) can't compete with vitamins found in whole fruit. Becoming popular in the "foodie" realm today is cold-pressed juice. Cold-pressed juice is extracted from the pulp of fresh fruits and vegetables at high pressures to extract maximum nutrients and are preserved without heat methods (pasteurization) meaning the precious nutrients are better maintained. This sounds good right? Well yes, until you see the price- most being at least $5 but usually closer to $10 per bottle. And let's get down to it, if you really want the full benefits of fresh fruits and vegetables you should mainly eat them in their most natural and whole form to avoid loosing their beneficial fiber. But we all need treats and fresh juice is one of our favorites! So if you're into juice too and given the price of cold-pressed juice we suggest springing for a juicer and making your own raw juice at home. Homemade juice is convenient, quick, economical, delicious and nutritious - more nutritious than any other juice forms we mentioned because it is the freshest. There are many juicer products ranging in price, two of our favorite high power juicer brands are Jack Lalanne and Breville. But take a peak at local garage sales this summer, people are usually selling their juicers because they don't know what they have! For this recipe we used a high power Jack Lalanne juicer but there is also another category of juicer, the slow juicer, which no worries we will discuss in another post. So let's get juicing! Cantaloupe Cooler PREP TIME: 5 mins TOTAL TIME: 7 mins Servings: Makes ~12 oz of juice Ingredients 1 medium cantaloupe, peeled and cubed 1 lime, peeled Pinch of sea salt Toss cantaloupe into your juicer. Turn the juicer on and watch that beautiful orange hue pour into your pitcher. Squeeze fresh lime and sprinkle sea salt on top. Pour into your favorite glass and sip away! **Don't have a juicer in your kitchen yet? No worries, many fruits and vegetables can be juiced using a high speed blender and cheese cloth or a cotton nut milk bag. Just put your peeled fruit in a blender, add a little bit of water, (this is optional, but will make the blending faster) and turn it on high. Once the ingredients have been blended into a puree, you can drink it as is, or strain the pureed though a cheese cloth or cotton nut milk bag to separate the juice from the pulp. 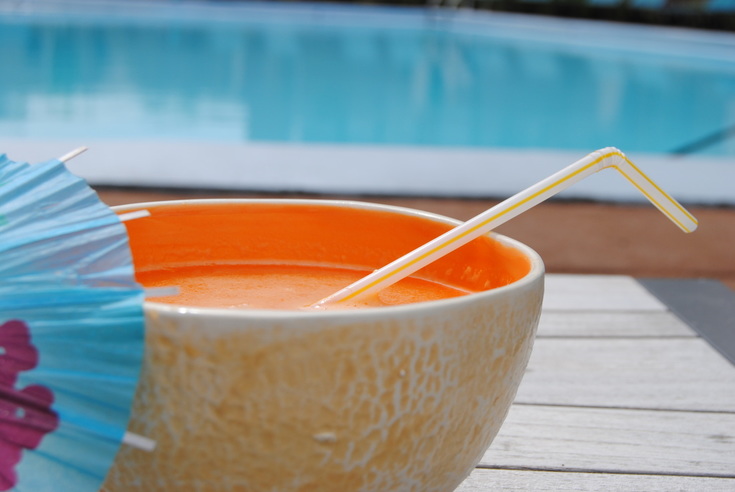 Is this juice a dream come true or what? If using a very ripe cantaloupe we think this juice tastes like an orange creamsicle and come on, what could be better than that on a hot summer day? We hope your summer is sunny, relaxing and delicious. If you need us you'll find us at the pool! Juice on, Jess and Cecelia P.S. Have you ever seen anything cuter than this cantaloupe bowl!? If you have to have one too you can purchase here. 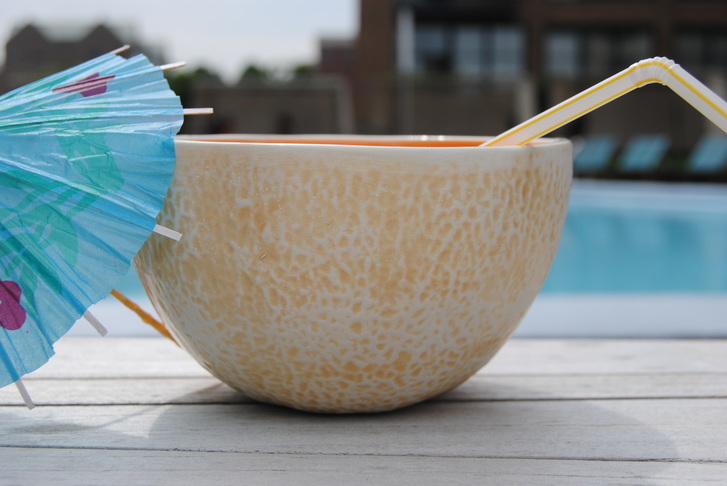
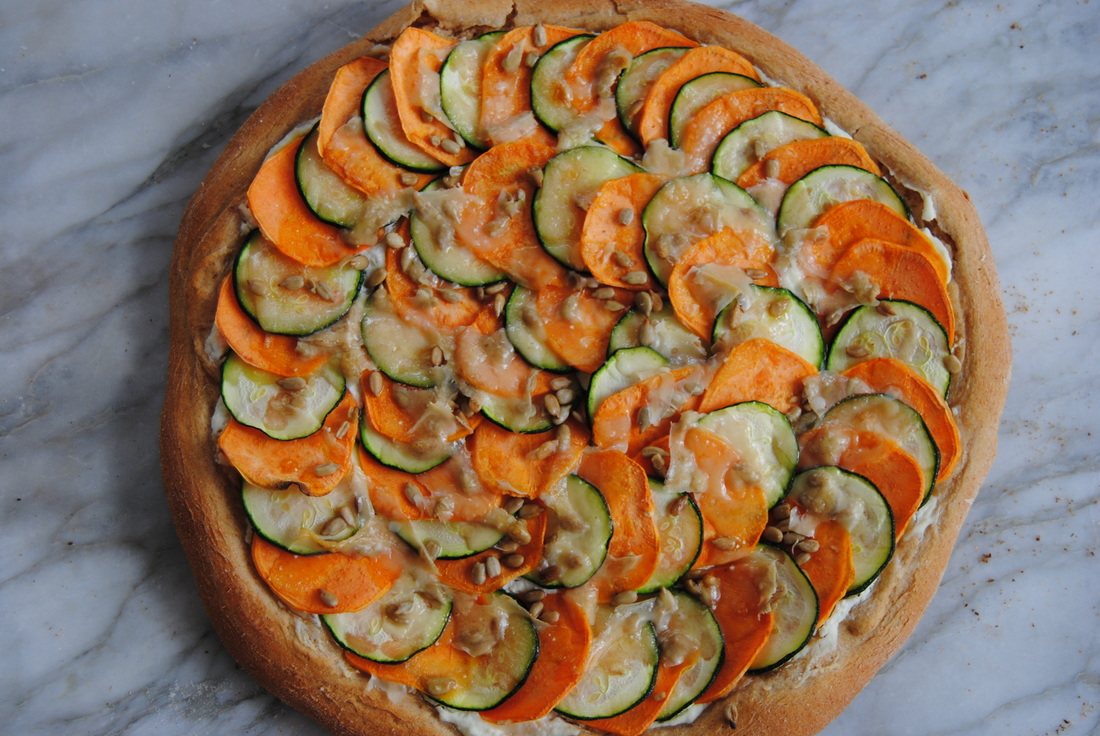
1 Comment
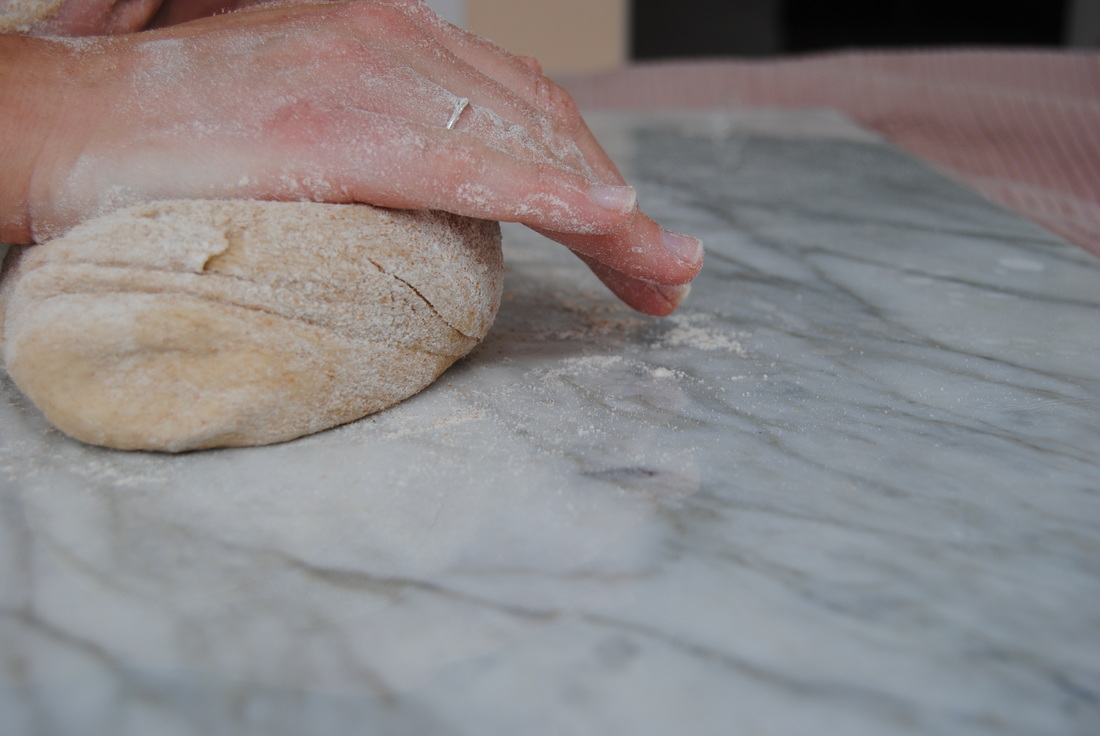
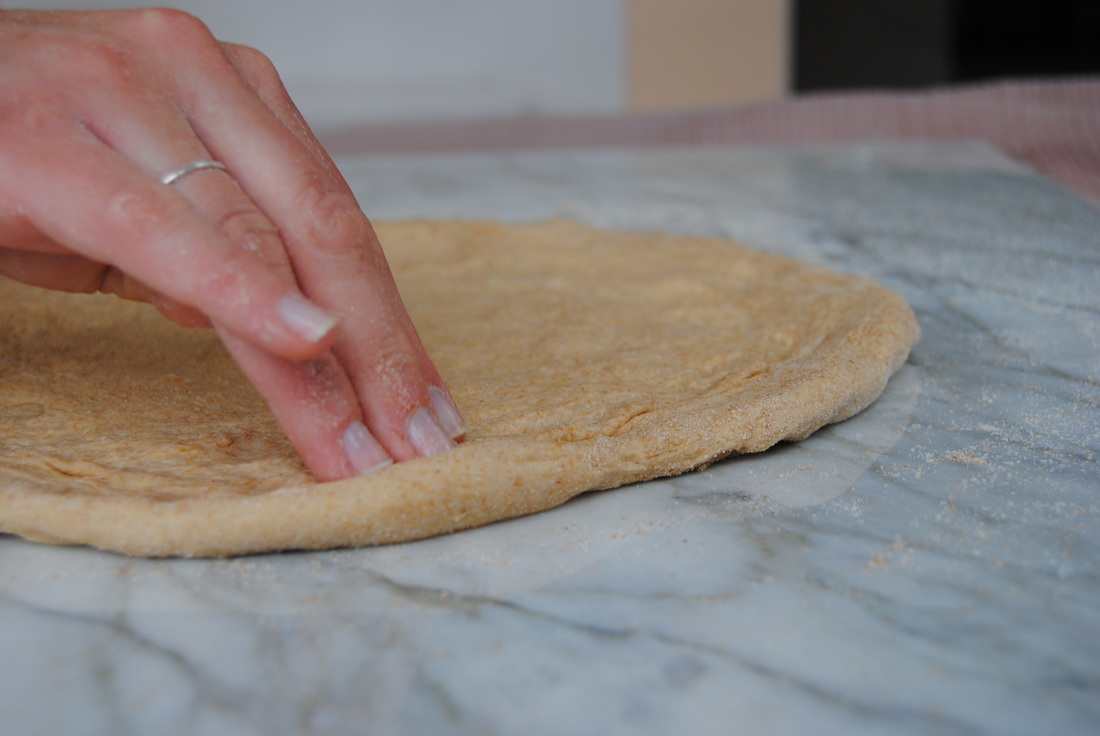
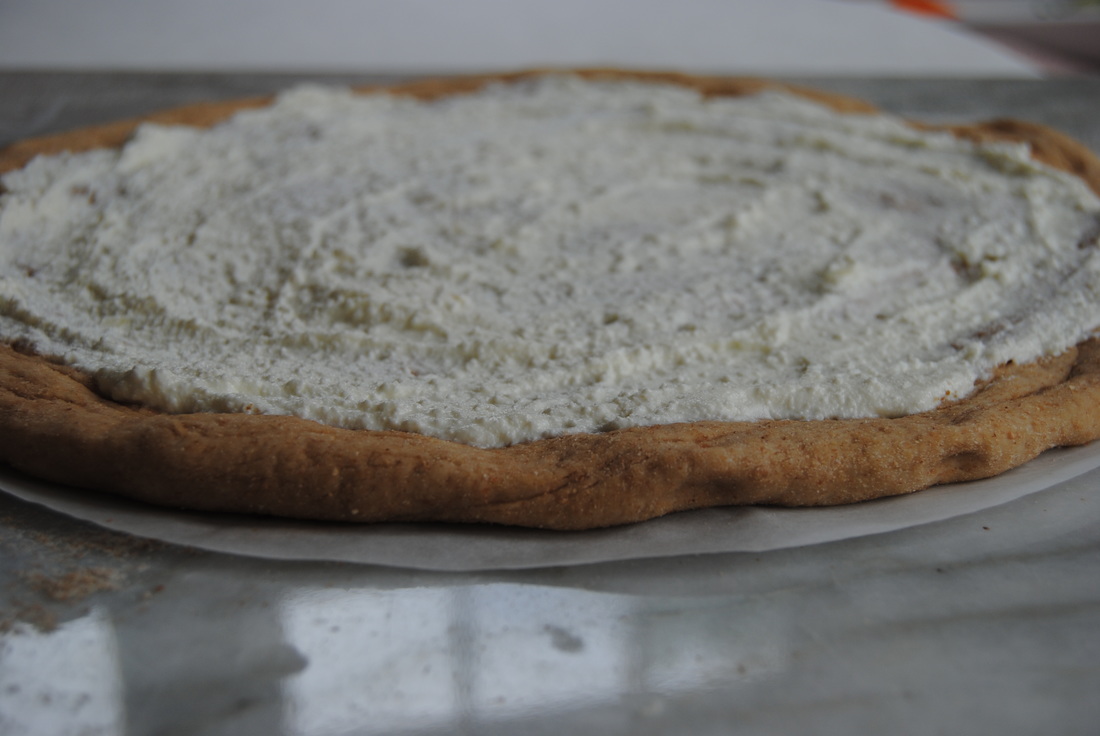
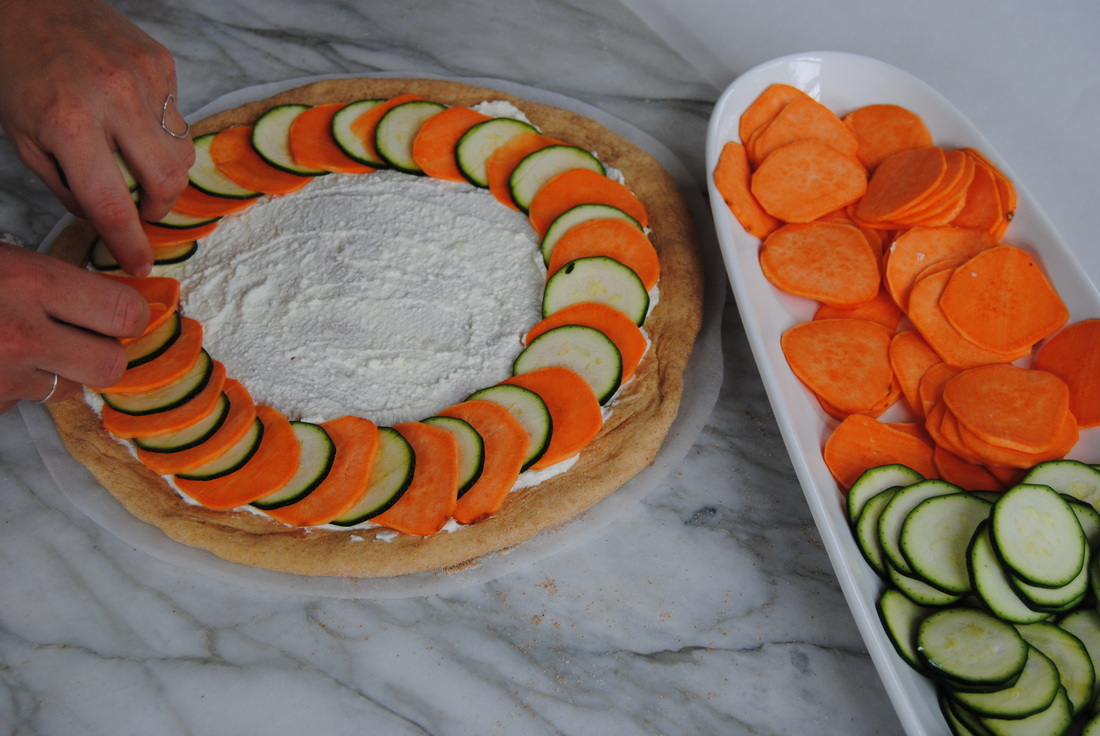
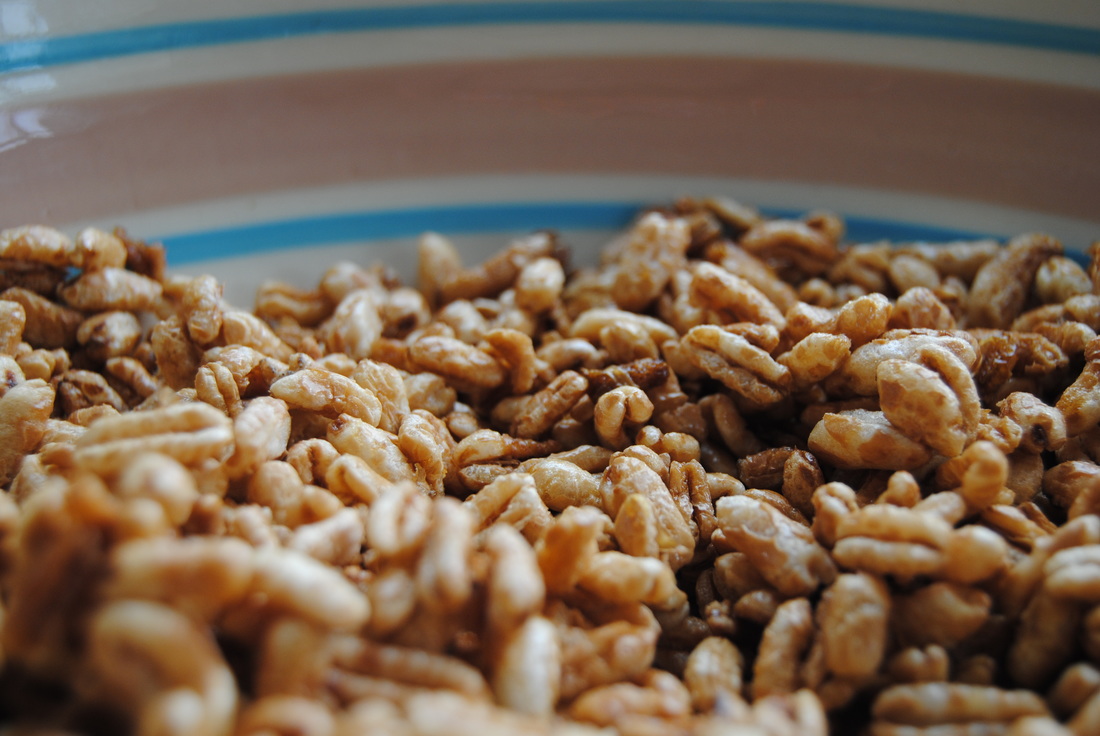
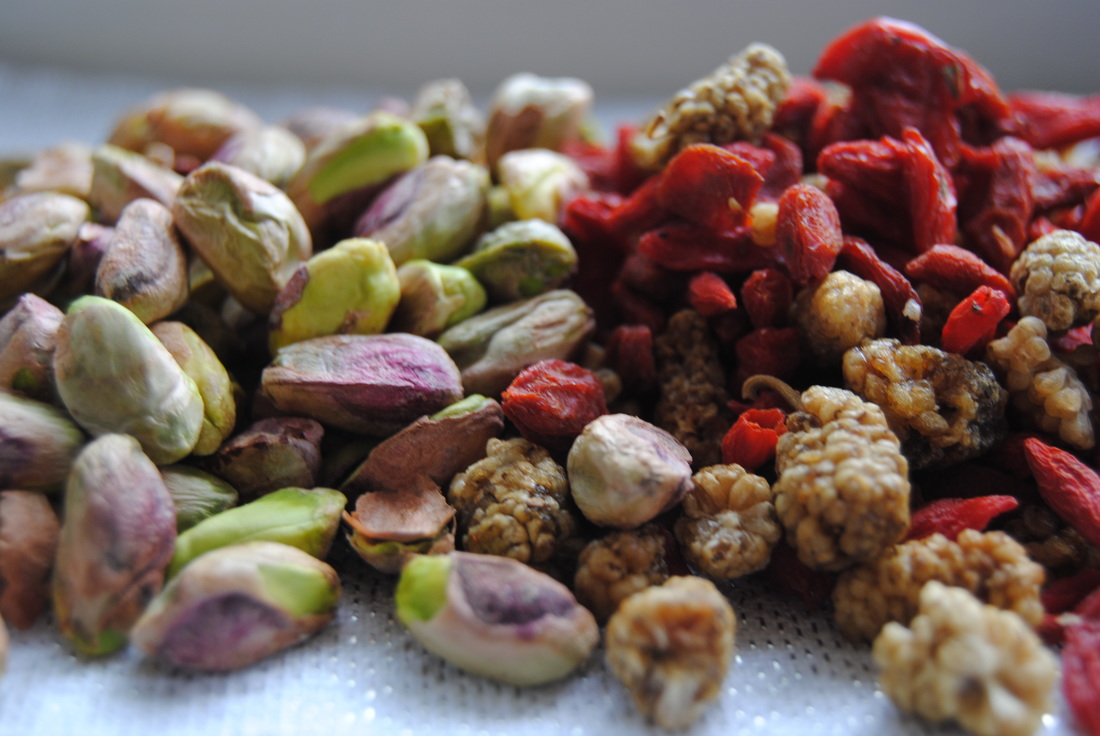
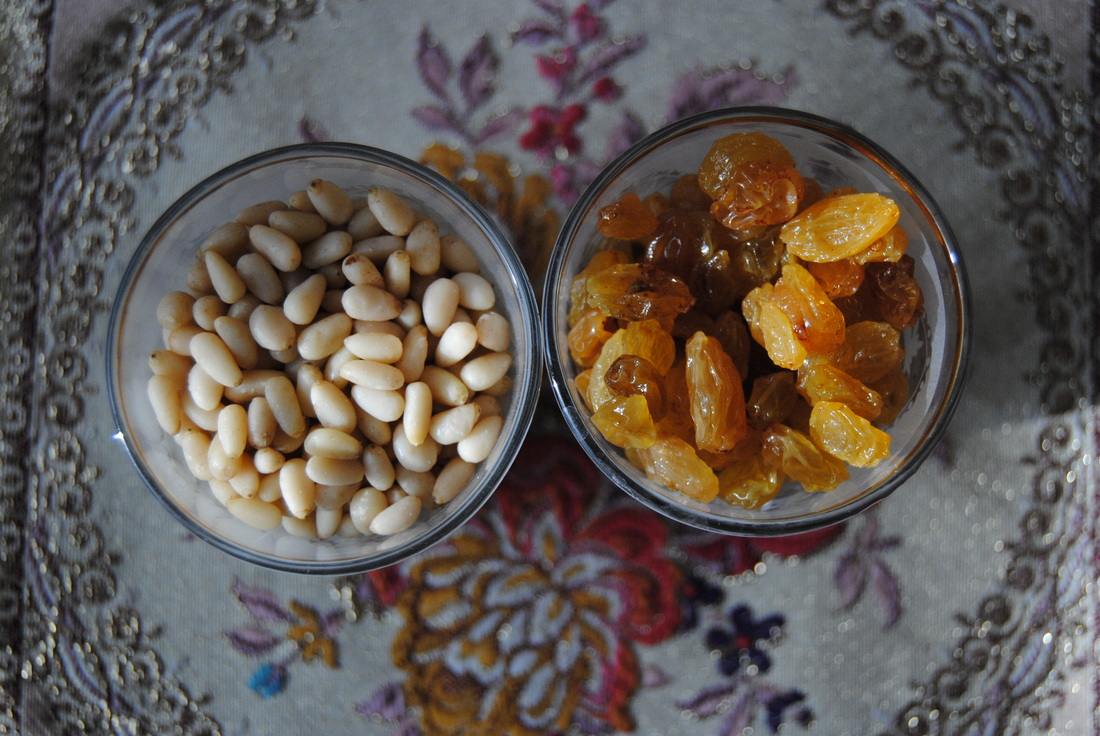
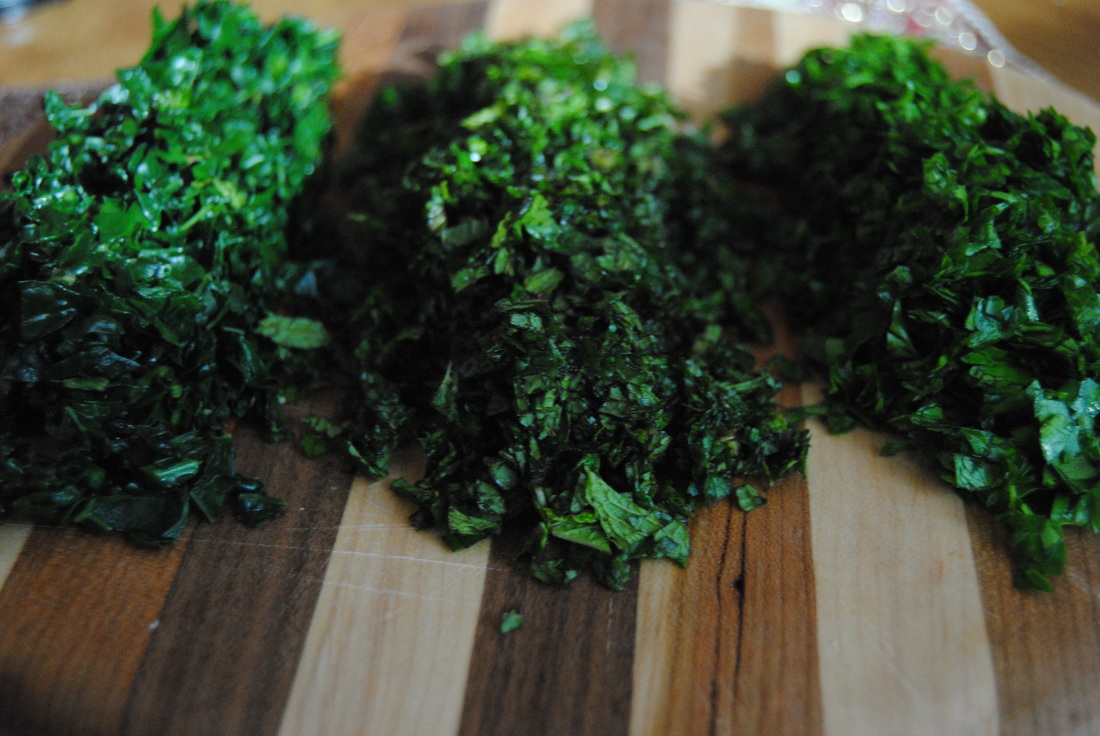
 From TGBK we want to wish you a happy summer solstice! It is the longest day of the year today, meaning the sun rises the earliest and sets the latest than any other day this year, do don't waste the daylight sleeping in. Well what to do with all the extra time today then? How about experimenting with something else that rises...you got it, yeast bread! This pizza crust recipe was adapted from a favorite bun recipe of ours and we have to say it is quite the showstopper. If you haven't experimented with yeast baking yet today is the day, but let's explain the process a little more first. 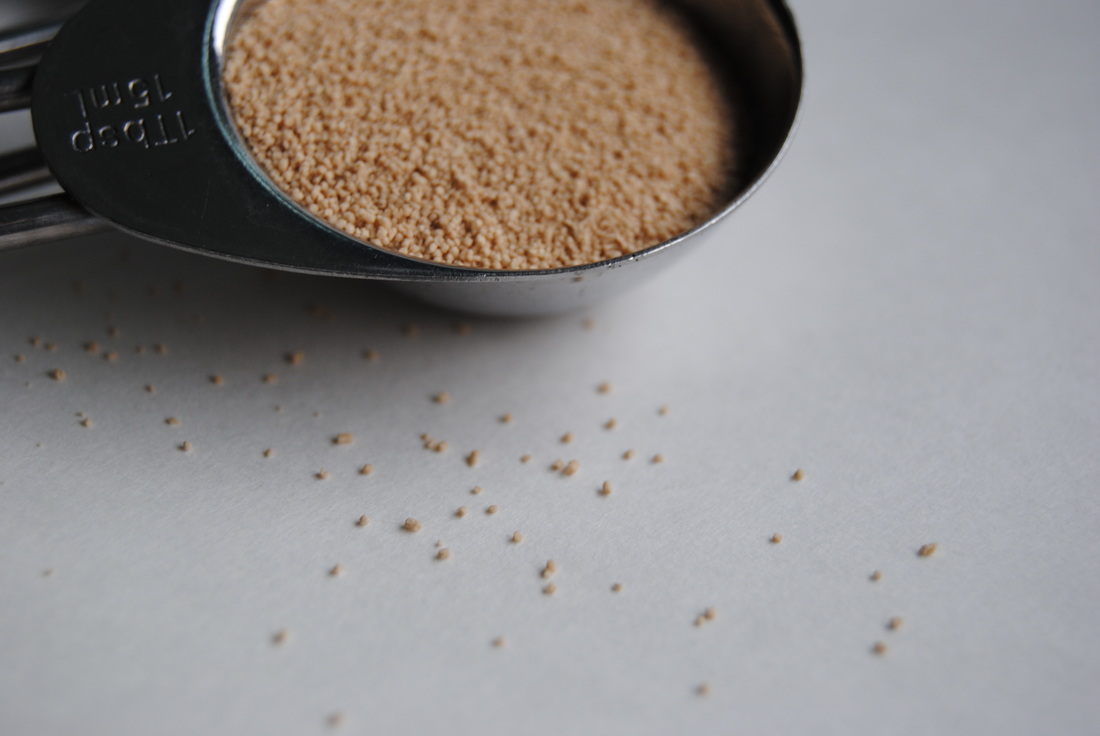 Yeast is a live, single-celled fungus of which there are about 160 species. The yeast we are most familiar with and most commonly used in baking is saccharomyces cerevisiae, or bakers yeast. This yeast lies dormant until it comes into contact with warm water. Once activated, yeast begins feeding on sugars (either added to the recipe or from the starch in the flour) and releases carbon dioxide. The carbon dioxide becomes trapped in the dough's elastic web of gluten (created through the kneading process) and makes the bread rise. Be careful though, since yeast are living they can be killed by overly hot water. Yeast prefer temperatures between 70-100 degrees Fahrenheit and liquids hotter than 139 degrees will kill yeast. So if your precious dough does not rise, this may be what happened. Though there are other reasons why you may not get the rise you were hoping for- we like this website for some more yeast bread tips and troubleshooting. So grab some yeast from the local store (active, dry yeast for this recipe) and lets get started!  The Perfect Crust PREP TIME: 30 mins TOTAL TIME: 45 mins Servings: 2 pizza crusts Ingredients 3 1/2 cups flour of choice (we used 2 cups whole wheat flour and 1.5 cups spelt flour) 3 Tbs sugar 1 tsp salt 2 packages active dry yeast 1 cup milk of choice (we used unflavored hemp milk) 1/2 cup water 4 Tbsp extra virgin olive oil + additional for greasing dough 1-2 Tbsp ground flax In a large bowl thoroughly mix 1.5 cups flower, sugar, salt, and yeast. Combine milk, water and oil in a small saucepan. Heat over low heat until liquids are warm but not too hot. Gradually add to dry ingredients and beat for two minutes with an electric mixer, scraping bowl occasionally. Add 1/2 cup flour and beat at high speed another two minutes. Stir in enough additional flour to make a soft dough (approximately 1-1.5 cups). Turn onto a lightly floured surface and kneed until smooth and elastic, about 5 minutes. Place dough in a bowl sprinkled with olive oil, turning to grease the top of the dough. Cover the bowl with a wet dishcloth, place in a warm location and allow dough to rise for 15 minutes. Turn the dough out onto a floured table, divide in half, and roll each half into a 9x10 inch circle. Sprinkle ground flax seed onto two circular baking sheets to prevent dough from sticking. Lay dough onto baking sheets and create your preferred pizza. Once pizza is prepared bake at 425 for at least 10-12 minutes to allow dough to fully cook. Dough can also be saved in the fridge for 3-5 days. Summer Spiral Pizza PREP TIME: 15 mins TOTAL TIME: 35 mins Servings: 1 pizza Ingredients Sauce 1/2 cup full fat ricotta cheese 2-3 cloves crushed garlic, depending on how much garlic you like 1 Tbsp extra virgin olive oil Toppings 1/2 medium raw sweet potato 1 medium zucchini 3 oz sharp cheese, shaved (we chose Parmesan) 1/8 cup roasted and salted sunflower seeds Sprinkle of crushed red pepper flakes, optional Drizzle of reduced balsamic glaze, optional Using a mandolin or a large chef knife, slice sweet potato and zucchini into 1/8" slices. Mix together olive oil and crushed garlic with ricotta cheese. Evenly spread ricotta mixture on top of pizza crust. As pictured, layer sliced sweet potato and zucchini one after another starting from the outside of the crust working your way to the center. Sprinkle sunflower seeds on top of vegetables and spread shaved cheese evenly over the top. Place pizza in preheated 425 degree oven and cook for 16-18 minutes until golden brown. Once out of the oven, sprinkle with desired toppings- crushed red peppers and reduced balsamic glaze are delicious! 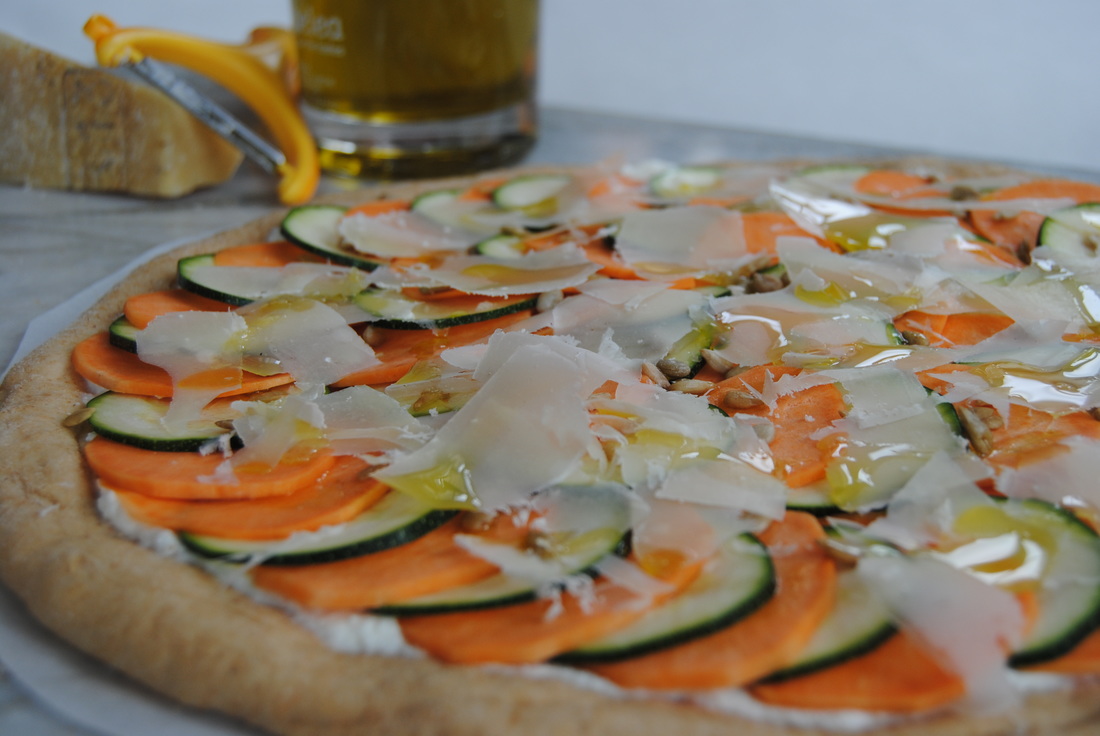 Okay, so how great was the crust? We promise you won't find that in the freezer aisle! This crust will be just as good with any variety of toppings so feel free to mix it up and create your own favorite. We loved showcasing zucchini topping for the summer but can imagine hundreds of other amazing combinations. Please experiment and let us know what you come up with, we love hearing from you! Rise and shine friends, Jess and Cecelia  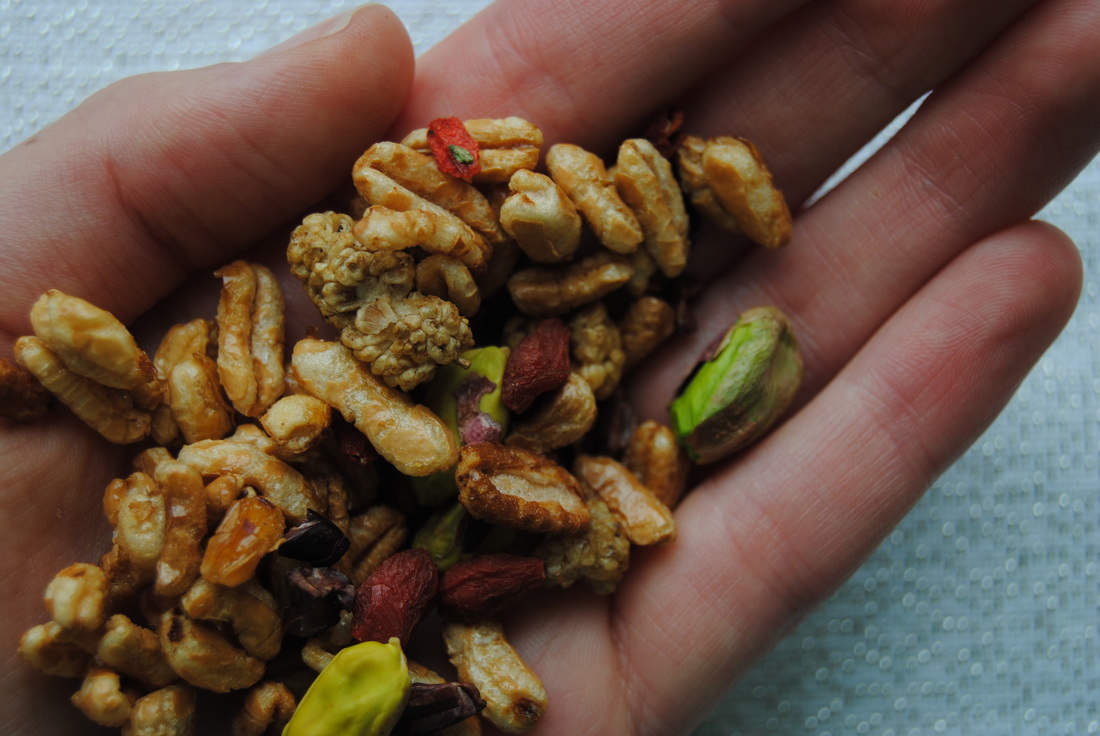 Here at TGBK we love a lot of foods but we have to say that one holds a special place in our hearts, yes you guessed it, chocolate. Now if you're into chocolate as much as we are and don't want to feel guilty about an everyday chocolate fix then this post is for you! And we're here to remind you that certain forms of chocolate are actually superfoods and a great addition to your diet. Now don't get crazy, we aren't suggesting you head down the nearest candy aisle- we are referring to cacao and raw chocolate recipes. Confused? Read on! 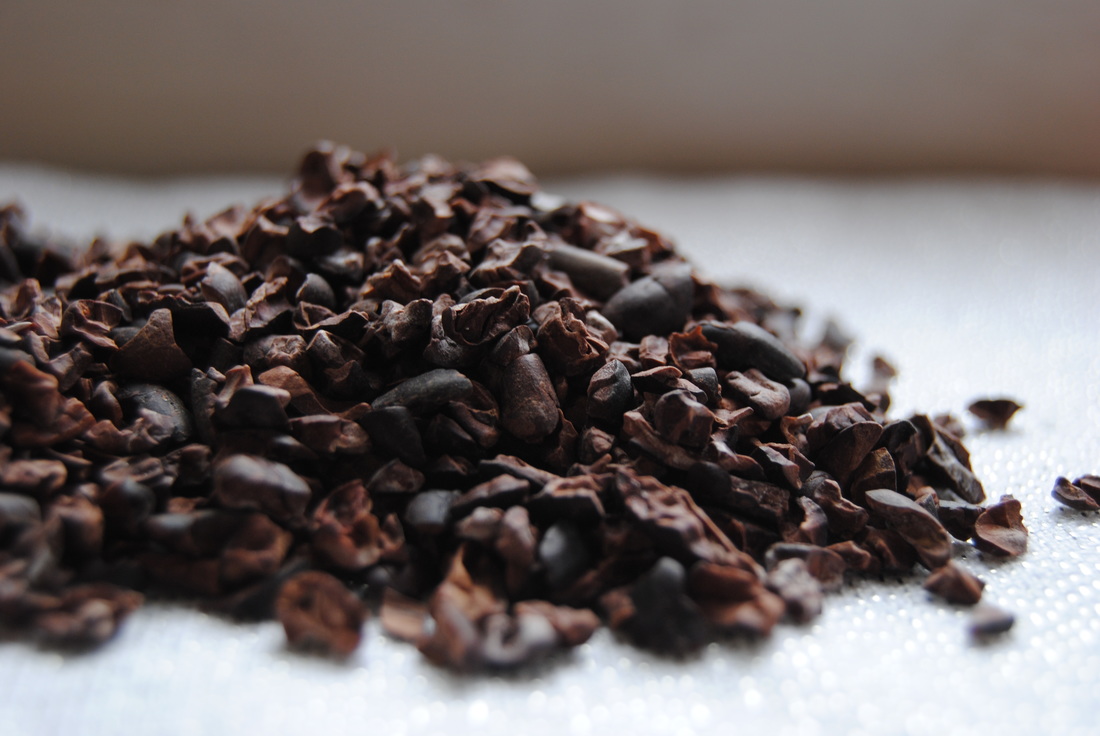 So the wonderful (and to us, holy) cacao bean is what provides the world with chocolate (hallelujah!). Cacao beans are seeds found in the fruit pods of the cacao tree which are harvested and fermented and then processed into the various chocolate products we know and love. However, this processing is what can make all the difference in final product and nutritional benefit. Many beans go through a roasting process to dry the beans and develop flavor and aroma, but this high temperature treatment can destroy the antioxidants that cacao contains which make it a superfood in the first place (refresher about superfoods here). Raw cacao products are alternatively dried at low temperatures to preserve these beneficial nutrients. The low temperature dried cacao beans can then be made into cacao nibs, cacao powder or cacao butter, all raw, antioxidant packed products that we love! This recipe features raw cacao nibs which are essentially crumbled cacao beans. They have a bold chocolate flavor that may be more tangy and bitter than you would initially expect, but remember this is 100% pure cacao with no added sugar or other ingredients. This recipe features not only cacao as a superfood but also mulberry and goji berry which have their own super qualities. Our favorite supplier of these super foods is Navitas Naturals - their website can provide you more superfood information and ways to find their products. You will notice that these products may be pricey but remember that you are paying for a high quality product. If you are budgeting look for these items in bulk bins at local co-op or specialty markets or search for bulk deals online. Once you get your raw cacao get going on this recipe! 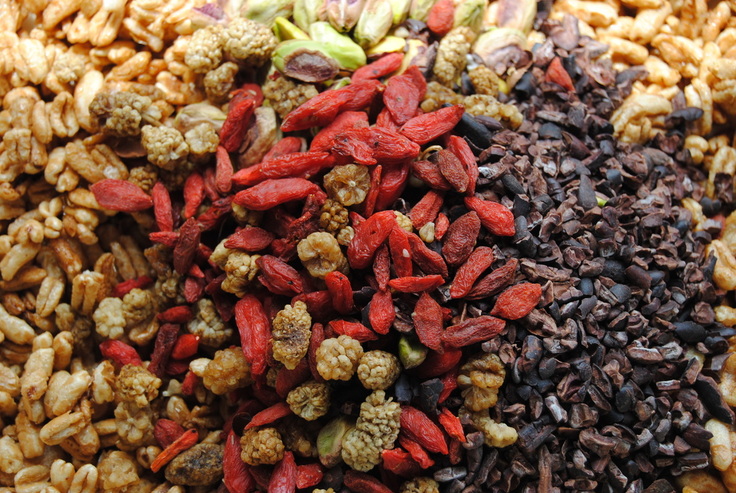 Holy Cacao Superfood Power Mix PREP TIME: 5 mins TOTAL TIME: 15 mins Servings: 7.5 cups Ingredients Toasted Cereal 6 cups unsweetened puffed kamut or puffed wheat 1/3 cup pure maple syrup 1 Tbsp coconut oil, melted 1/8 tsp sea salt Superfood Power Mix 6 cups unsweetened puffed kamut 1/2 cup raw cacao nibs 1/4 cup raw goji berries 1/4 cup raw mulberries 1/2 cup raw pistachios 1/4 tsp sea salt Preheat oven to 350 degrees. Line a large baking sheet with parchment paper and set aside. Measure out 6 cups of puffed kamut and place into a large bowl. Combine 1/3 cup pure maple syrup, 1 Tbsp melted coconut oil, and 1/8 tsp sea salt in a small bowl, stir to combine. Pour liquid mixture over puffed kamut and stir until evenly coated. Spread mixture onto parchment lined baking sheet and toast in the oven for 10 minutes. Remove from oven and allow to cool. Combine all ingredients (cooled kamut, cacao nibs, goji berries, mulberries, pistachios, and sea salt) in a large bowl. Portion out into individual 1/2 cup servings if desired. Store mix in air tight containers, we prefer a small jar we can throw in our purse or backpack for an on-the-go healthy snack! 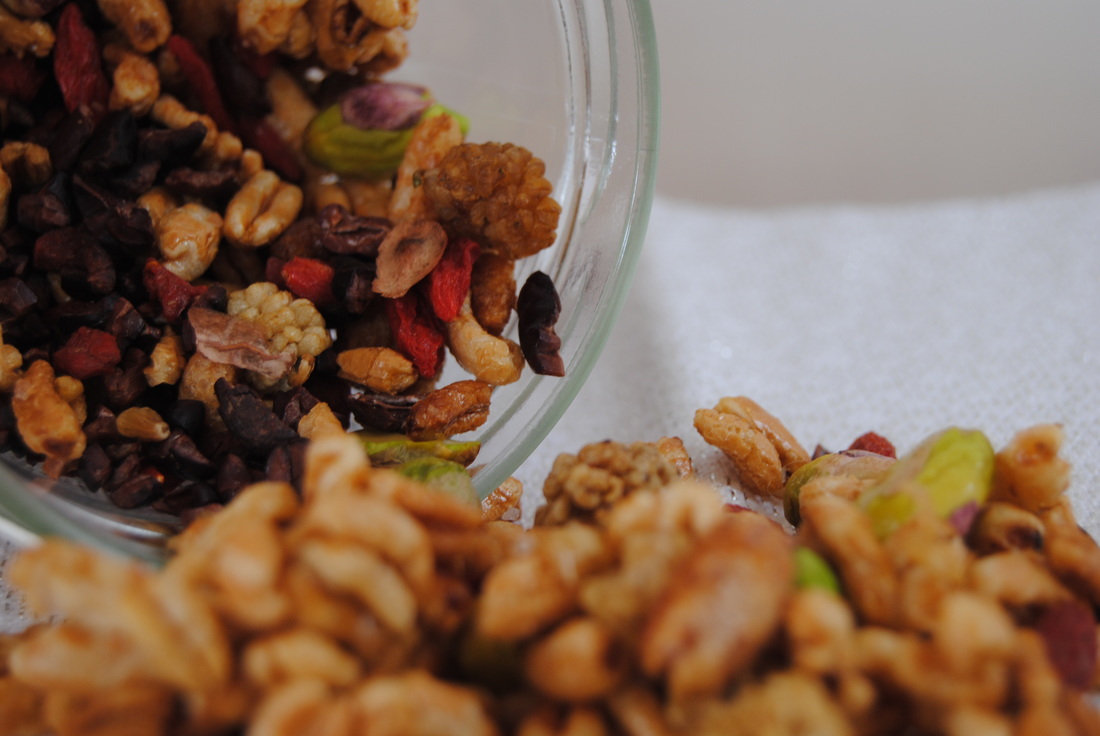 Have your prayers been answered with this power mix? We sure hope so! We love the toasty, sweet cereal mixed with the bold cacao nibs and chewy, slightly sour berries. You can feel good snacking on this anytime of the day or even as a delicious superfood cereal with homemade almond milk. Hey, we could all use a little more raw chocolate in our lives. Have a rawesome week! Jess and Cecelia 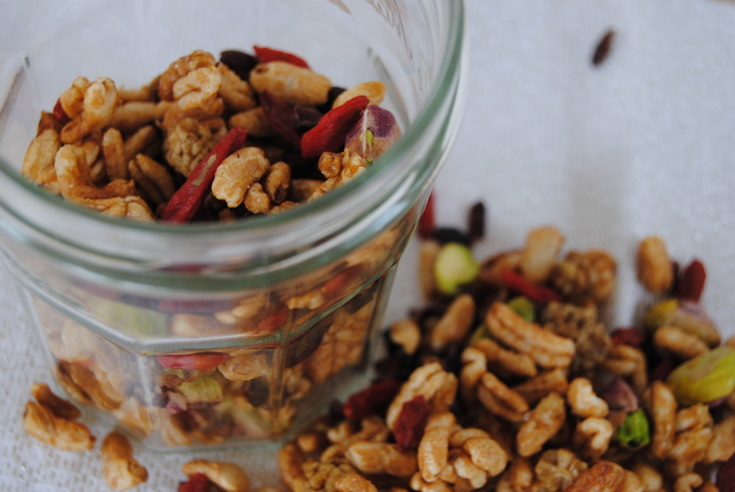 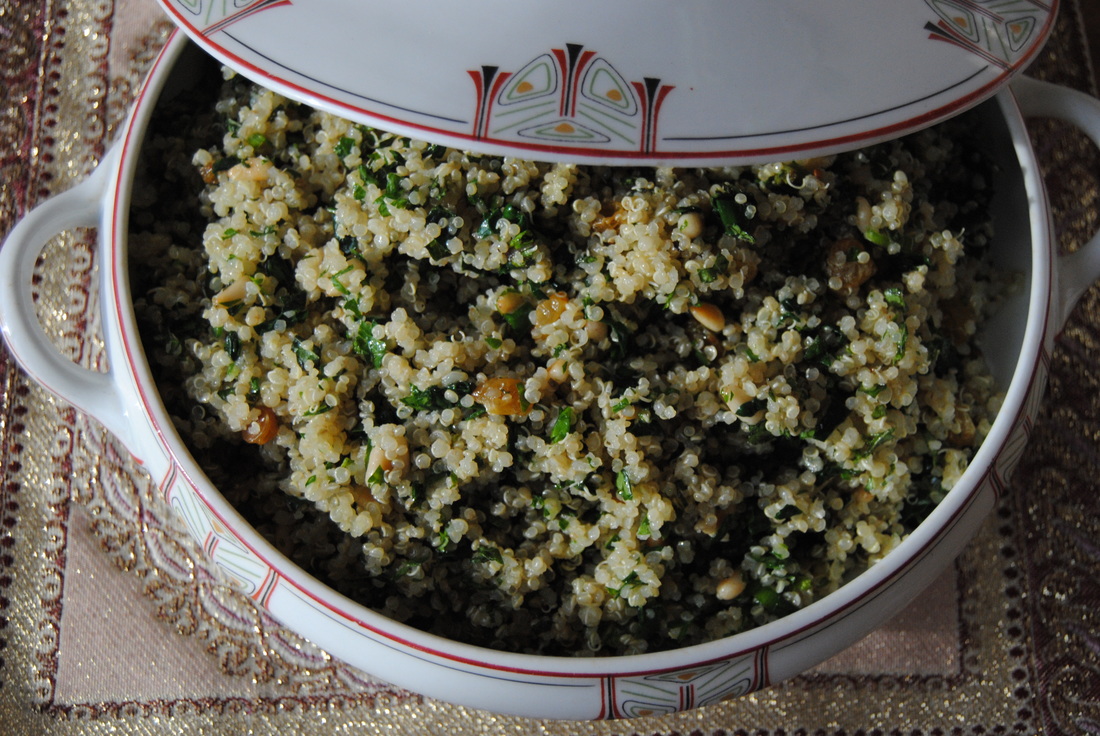 If you remember your school days and biology class (yeah right!) you may remember that an herbivore is an animal adapted to eating plant material. They have digestive systems that allow them to eat a wider range of plant material than say humans, whom are considered omnivores. Though some of us still choose to eat primarily plants. When considering the wide range of plants available to eat, we think there are some options that are underutilized- one being fresh herbs. Most fresh herbs can be found in dried and ground forms making them last longer and simpler to use. However, we believe fresh herbs to be superior in taste and nutritional quality. So what better time than spring to start adding more fresh herbs into your diet? And we're going to help you do that with this recipe. 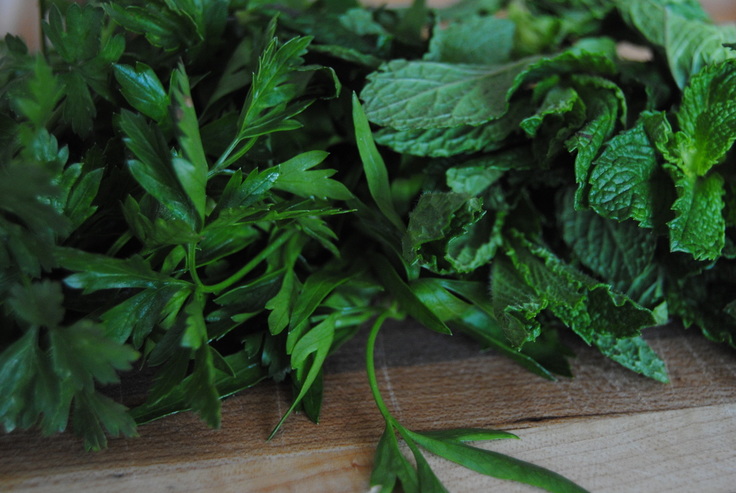 Herbs have pretty much been used since the start of civilization for decoration, flavoring and as remedies for illness. Besides their culinary uses, most herbs boast a variety of other qualities that you might not be aware of. Take parsley and mint for example (pictured above)- chewing these fresh herbs has been a natural remedy for bad breath for thousands of years. If the leaves are swallowed after chewing these herbs will continue to provide fresh breath during the digestion process. Also during digestion, parsley and mint may reduce the production of intestinal gas and odor promoting better digestion and combating indigestion. Now can any chewing gum do all that!? We recommend trying to find organic herbs whenever possible or growing at home. If you're worried about wasting these precious fresh herbs freezing is the next best alternative to fresh. Simply chop the remaining herbs and portion into ice cube trays, cover with some water and freeze into herb ice cubes. Once frozen remove from the trays and save in the freezer for your next recipe, just thaw under lukewarm water and voila! The taste will not be as strong as fresh but still delicious. Okay so whose ready for this recipe? Herbalicious Tabouli Inspired Salad PREP TIME: 20 mins TOTAL TIME: 25 mins Servings: 4 Ingredients Salad 1 cup dried quinoa (we used sprouted) 1 1/2 cups raw kale 1 1/4 cup organic parsley leaves 1 cup organic mint leaves 1/2 cup golden raisins 1/3 cup pine nuts, roasted 1 green onion (green top only) Dressing 1/4 cup extra virgin olive oil 2 Tbsp lemon juice 1 Tbsp honey 1 1/4 tsp sea salt 1/2 tsp cracked black pepper Add 1 cup dry sprouted quinoa to a pan with 2 cups water. If you are not using sprouted quinoa make sure to rinse quinoa under running water until water runs clear before cooking. Bring quinoa and water to a boil. Reduce the heat to simmer, cover pan and continue cooking for 12-15 minutes or until the liquid has absorbed. While the quinoa is cooking, begin preparing the kale. De-stem kale, add to a pot with a steaming basket over a few inches of boiling water, cover, and steam for 1-2 minutes until dark green in color. Set aside to cool. Rinse the parsley and mint and finely chop along with the cooled steamed kale. Thinly slice the green top of the onion and set aside. In a small pan, over medium heat, lightly toast pine nuts until golden and fragrant. About 3 minutes. Combine the dressing ingredients - olive oil, lemon juice, honey, salt, and pepper - in a small bowl and whisk until combined. In a large bowl, mix together the cooked quinoa, chopped kale, parsley, cilantro, onion, toasted pine nuts, and golden raisins. Pour the prepared dressing on top of your salad, lightly toss together and let sit for 15 minutes for the flavor to meld. Enjoy as a main dish, side dish, or as a healthy herbalicious snack! 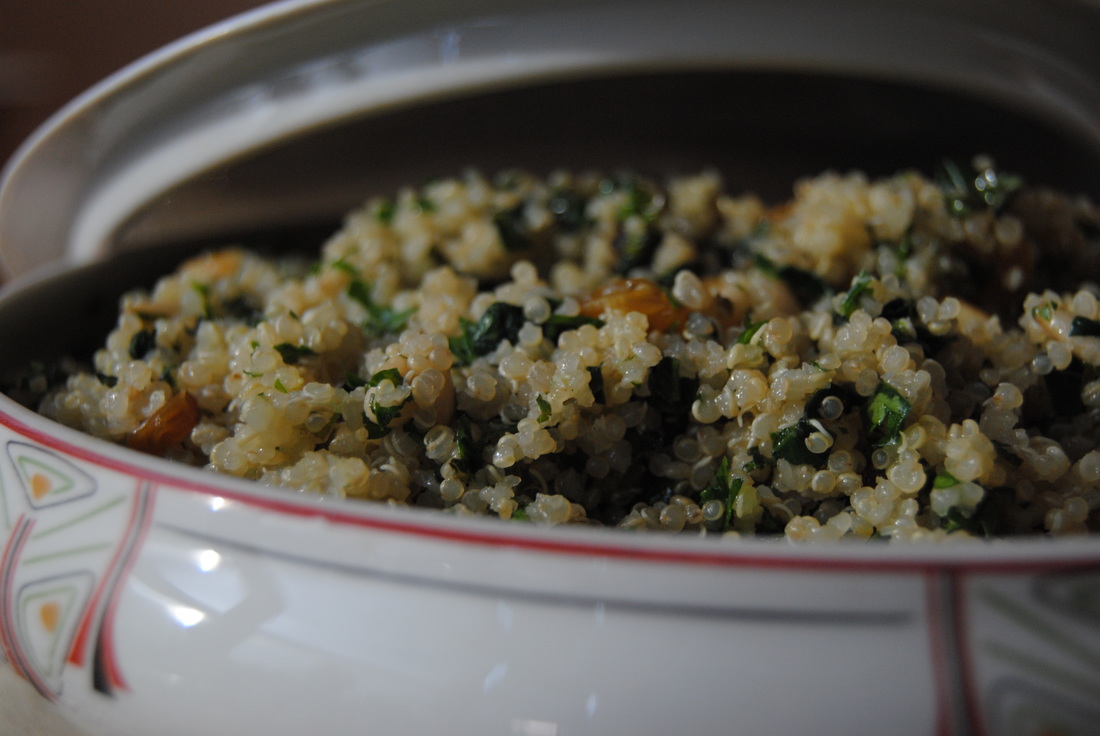 Is your breath minty fresh after that meal? Then you might want to add this dish to your date night repertoire instead of garlic toast (ha!). So keep your eye out for fresh herbs at the farmers markets this season or maybe think about starting a garden of your own, because as you can see, fresh herbs are a must in your culinary tool kit. See you next thyme, Jess and Cecelia 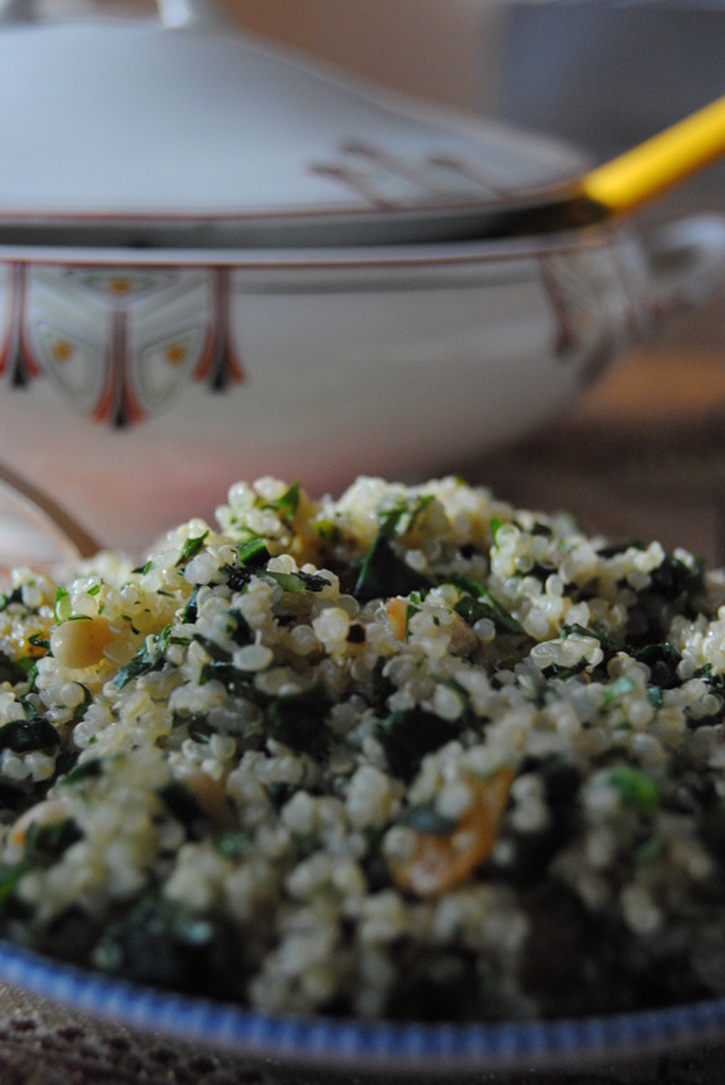 |